
Just remember you can only blend if all objects are together things cant be on separate layers. Tips for Better Blending in Procreate Use Monochromatic and Analogous Colors.

Daily Planner Procreate Brushes Hand Drawn Procreate Stamps Etsy Australia Planner Stamps How To Draw Hands Digital Stamps
Repeat the blending process using the Smudge tool with different pressure sensitivity.

. In my experimenting it makes no difference what color is chosen when blending. In Procreate Pocket you can copy and paste from the Actions menu. Next click on the wrench to open the Actions menu.
The Blend Modes menu has two parts. Ill give you a quick look at 4 styles of blending and you can see how each brush behaves when blending colors. While youll still see some modes alter the image on its own to get the most impact it helps to have another layer below to interact with.
Now look at a layer and look for the N letter on the right next to the checkbox. Select Another Color The color can be anything you want. 1 Start by going to the Layers panel Stacked squares icon on the top right.
No matter how you choose to use the smudge tool blending with it will be the same. Lower the Opacity and Apply the Color. Selected Color When Blending Ive seen a few tutorials where they change the selected color to match what they are blending.
Looks better when the opacity is lowered. This layer has an arrow pointing down on it. You can customize the size and shape of the eraser manually or by choosing options from the Brush Library.
The N stands for Normal mode. Increase the pressure of the smudge tool by dragging the Pressure Sensitivity slider up. Or you can tap and hold to smudge with the current brush you are using.
Make a clipping mask If you dont know how to do this you can just put your objects one one single layer. To blend select the clipping mask layer and blend as usual. Then use the Smudge Tool to blend the colors together and the Gaussian Blur adjustment to smooth everything over.
You can switch to this tool by tapping on the hand icon in the top right corner. Youve been notified by email. Tap the eraser icon to open the Eraser which lets you fix mistakes.
Interface Change Blend Mode. Do you want to get better at blending in Procreate. For shading I create a new layer and use a reddish color to simply paint over the areas I want.
Opacity controls how transparent a layer is. The name of the current Blend Mode and the Opacity slider. This blend mode uses only black white cyan yellow magenta red green and blue.
After tapping on the N you will see a dropdown of Blend Modes as well as Opacity. We sent you an email. This method is the most labor intensive of all the methods in the Procreate Pocket sense of.
First open the Layers Panel by tapping the double rectangle symbol in the top right of Procreates. This way you get a nice and smooth blend. The easiest way to create a blend effect in Procreate is by using the smudge tool.
Be careful of brush size if the clipping mask layer is small. Procreate is an iOS app for the iPad family and Procreate pocket for the iPhone. Your Procreate account has been deactivated.
To shade and blend on Procreate the best tool to use is the smudge tool paired with one of the airbrushes. Along with the opacity youll see this is where you can change the blend mode. How to Blend Colors in Procreate.
By adjusting the size of the smudge brush its possible to achieve the best shading and fading for both small and precise areas as well as large and sweeping areas. Change and apply a Blend Mode. Stick to a Single Layer.
Interface Change Blend Mode. When blending in Procreate be sure to use one layer. This subreddit is a community about using the Procreate app learning from each other drawing lettering.
Hard Mix The hard mix blend mode creates a flat look. Blending With the Smudge Tool. Opacity controls how transparent a layer is.
Tap the Smudge tool button and select a Flat Brush Wet Flat Brush Damp Brush or any other brush as desired. How do you blend in procreate. However I recommend that you use black or white for shadows and highlight.
The name of the current Blend Mode and the Opacity slider. Apply Any Color The first thing you need to do here is apply your primary color to the canvas so you get a starting point. First open the Layers Panel by tapping the double rectangle symbol in the top right of Procreate.
These 10 tips will help you improve your blending skillsIn the video I will show you how to blend using. You can create part of your design on. Turn on Alpha Lock.
Tap the smudging finger icon to open the Smudge tool which allows you to blend and mix colors with your finger or a compatible stylus. So that you have a clarity on how to use itI rea. The Blend Modes menu has two parts.
Procreate has a handbook thats searchable and updated for. The pin light blend mode removes all the mid-tones by using Darken and Lighten modes together. Complementary colors are often difficult to blend on Procreate.
Step 3 - Select a blending brush style. Select the top layer of your mask This is the layer that is clipped. Hi guysIn this Procreate tutorial I teach you guys the basics of the blendsmudge tool and how it works.
To do so click on the Modify button to drop down the top menu. Select the brush style you want to use in your artwork. From there click on the Add tab to access the Copy and Paste buttons.
2 Tap on the N to see the Blend modes. A step by step tutorial for Beginners Step 1. If you tap the N a panel expands revealing the settings for that layer.
To blend colors in Procreate fill your entire layer with one of the colors youd like to use and paint over it partially using a brush in the other color youd like to mix. Once you confirm you can start posting content. Blending is a pretty basic thing and its covered in a lot of tutorials.
When Im done with my sketchoutline I create a new layer underneath the sketch layer you can name it base if. To Select your blending brush tap on the Smudge tool Pointer Finger Icon top right next to the brush icon.

Procreate Hands Stamp Brushes Guide Brushes Portrait Guide Procreate Stamps Procreate Brushes Hand Drawing Realistic Hand Hand Art Drawing How To Draw Hands Drawings

How To Blend 10 Tips To Improve Your Blending In Procreate

Blender Brush Or Smudge Tool In Procreate On Ipad Pro Jspcreate

Procreate 5 Updates For Hand Lettering And Calligraphy Loveleigh Loops Procreate Lettering Hand Lettering Tutorial Hand Lettering
Paint Smudge And Erase Procreate Pocket Handbook

Update Smudge Tool To Use 1 0 Gamma

Confused About The New Blend Feature
Blender Brush Or Smudge Tool In Procreate On Ipad Pro Jspcreate
Drawing App Procreate Pocket Available For Free Through Apple Store App Macrumors

Realistic Procreate Watercolor Kit Video Video Watercolor Illustration Tutorial Flower Art Painting Watercolor Kit
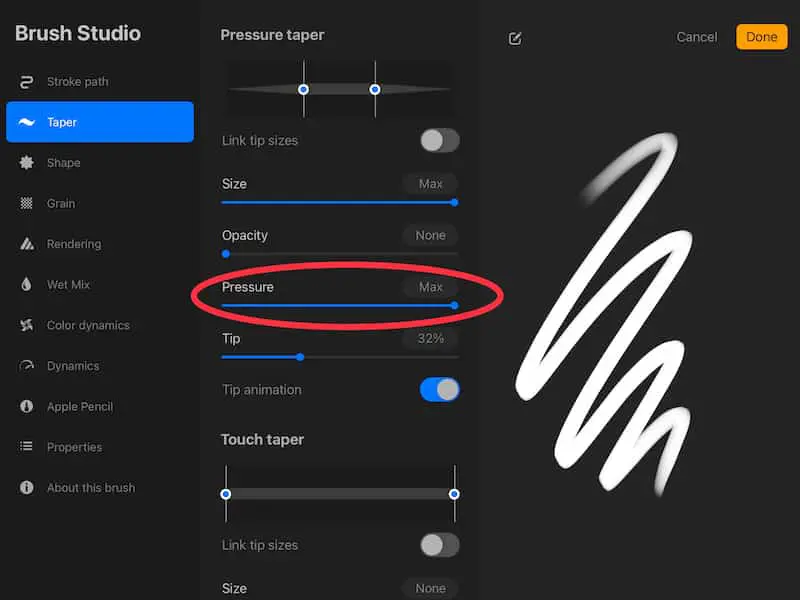
Ultimate Guide To Procreate Brush Taper Settings Adventures With Art
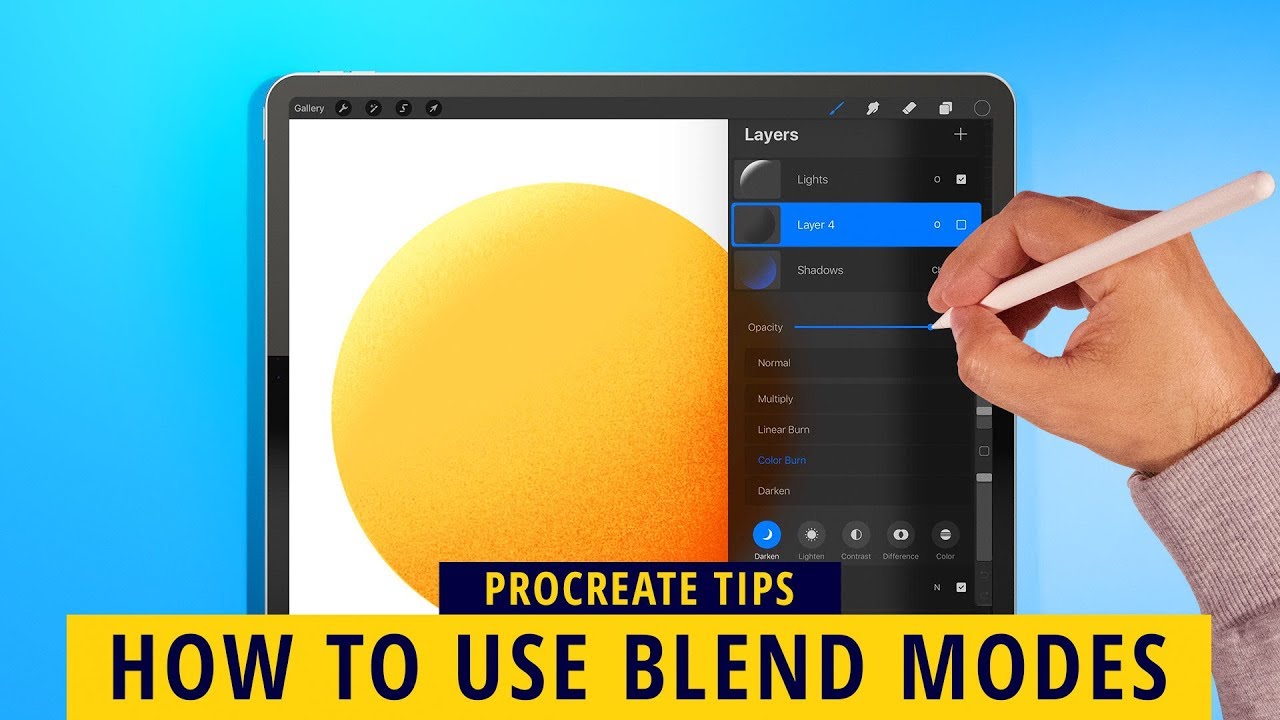
How To Use Blend Modes In Procreate Youtube

How To Outline Your Stickers In Procreate Procreate Procreate Ipad Art Procreate Tutorial Procreate Ipad Tutorials

Procreate Pocket Landscape Tutorial Youtube Procreate Tutorial Landscape Tutorial

Procreate 5 Arrives With Photoshop Brush Import Animation Assist And Cmyk Mode Photoshop Brushes Photoshop Animation

Procreate Tutorial Part 8 Smudge Youtube

Pin On Jungkook

Ipad Scrapbooking In Procreate With Pocket Templates By Time Out Scraps Scrapbook Ipad Lettering Procreate

How To Trace On Procreate Youtube Tracing Art Procreate Ipad Art Procreate